



How to Test Camping Gear Durability: 7 Field Checks
Table of Contents
- How to Test Camping Gear Durability Before Your Next Trip
- Your Pre-Trip Camping Gear Checklist
- How to Inspect a Tent for Structural Wear
- The Tent Waterproofing Test You Can Do at Home
- DIY Stress Tests for Zips, Buckles and Fabrics
- Camping Gear Maintenance That Extends Lifespan
- Repair or Replace? Making the Call
- Conclusion: Build Durability Testing Into Every Trip
- Frequently Asked Questions
Last Updated: October 16, 2026
How to Test Camping Gear Durability Before Your Next Trip
Learning how to test camping gear durability is the difference between a dry night and a soggy walk back to the car.
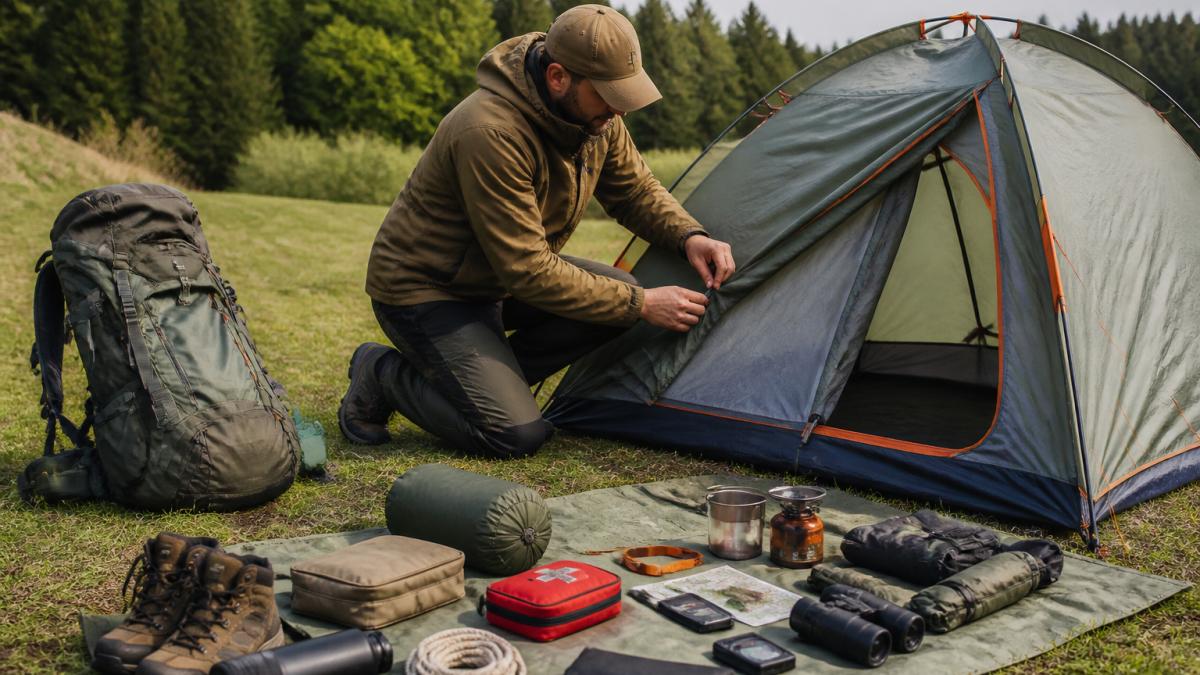
This guide covers seven field checks you can run at home in under an hour, no lab equipment needed.
Camping gear durability is not a single spec on a label but the combined condition of fabric, seams, hardware and coatings, each failing in its own way.
Your Pre-Trip Camping Gear Checklist
Run this check two weeks before you leave, not the night before. It gives you time to repair or replace anything that fails.
- Pitch the tent and check every seam for splitting or pulled stitching
- Run every zip from end to end, listening for grinding
- Press each pole joint and look for cracks or splinters
- Test guy lines and peg points for fraying
- Shake out the sleeping bag and check the baffles and zip
- Turn the backpack upside down and check straps, buckles and base fabric
What to Check on Tents, Sleeping Bags and Backpacks
Tents fail at seams and peg points first, sleeping bags at the zip and lining, and backpacks where the shoulder strap meets the body. Focus your time there.
How to Inspect a Tent for Structural Wear
Pitch the tent fully, then work around it in one direction, inside included. A tent that sags at the ridge or pulls loose at the corners has lost its structural integrity.
Checking Seams, Poles and Peg Points
Start with the seams. Look for pulled stitching, opened needle holes and white stress marks along the fold.
Next, the poles. Assemble each, flex it gently listening for a crackle, and check the joints and shock cord. A stretched cord still works, but the pole will not seat properly.
Then the peg points. Tug each one firmly. If the webbing lifts away from the tent body, the stitching has already started to fail.
The Tent Waterproofing Test You Can Do at Home
A tent waterproofing test tells you whether the coating and seam tape still repel water. Run it in your garden or bathroom in about twenty minutes: pitch the tent and pour a small cup of water slowly onto the flysheet.
- It beads and rolls off: the DWR treatment is working
- It soaks in and darkens the fabric: the coating has worn through
- It drips through inside: the fabric or seam tape has failed
Repeat on the floor and each taped seam. Check the hydrostatic head rating on the label: a higher number means the fabric resists more water pressure before it leaks, so a low-rated tent in heavy rain means wet nights.
DWR and the waterproof coating are two different things
DWR (durable water repellent) is a surface finish on the face fabric that makes water bead and roll off, but it does not stop water getting through the fabric itself.
The waterproof coating (usually polyurethane or silicone on the inside face) is what actually blocks water. It sits behind the fabric and is measured by hydrostatic head.
Seam tape bridges the needle holes where panels are stitched, and fails by lifting at the edges, going chalky or peeling away.
Reading your test result
| What you see | What has failed | Fix |
|---|---|---|
| Water beads and rolls off | Nothing | None needed |
| Fabric darkens and wets out, no drips inside | DWR only | Reproofing spray or wash-in |
| Water passes through the fabric | Waterproof coating | Replace the tent |
| Drips at stitch lines only | Seam tape | Seam sealant or re-taping |
| Drips across a whole panel | Coating and tape | Replace the tent |
If water soaks in but does not pass through, you do not need a new tent: a reproofing spray or wash-in restores the DWR layer on most flysheets, a cheap fix compared to replacing it.
Reproofing: spray versus wash-in
Both restore DWR but suit different tents.
- Spray-on gives you control: apply it to the outside of a pitched flysheet, avoiding the floor and inside face. Best for tents with a separate groundsheet or where you only need to treat the fly.
- Wash-in treats the whole fabric evenly, including the inside. Faster for a full tent, but it can reduce breathability if over-applied and is harder to keep off the floor.
Whichever you use, clean the tent first with a dedicated technical fabric cleaner, not household detergent, residue stops the new DWR bonding. Apply in dry, still conditions and let the tent dry fully before packing.
For guidance on waterproof ratings and fabric care, the UK Camping and Caravanning Club gear advice is a useful starting point.
DIY Stress Tests for Zips, Buckles and Fabrics
Hardware fails more often than fabric, so test it by category before you trust it, because a backpack zip and a tent zip fail for different reasons.
Zips
Close the zip fully, then open it in one slow, steady pull; it should glide with light resistance. Grinding, catching or splitting behind the slider all point to a worn track.
Mons Peak IX Night Sky Home & Field Repair Kit →
Run this three-part check:
- Slider grip. With the zip closed, pinch the two sides of the track and try to pull them apart. If they separate behind the slider, the slider body has worn and no amount of cleaning will fix it. Replace the slider or the zip.
- Track condition. Look for missing, flattened or shiny teeth. Shiny teeth mean the coating has worn and the zip will slip under load.
- Pull and tab. Tug the pull tab sideways. A tab that bends easily or a frayed cord will snap at the worst moment. Replace the cord before it goes.
Clean the teeth with an old toothbrush, then rub a little silicone or zip wax along them. Do not use oil-based lubricants, which attract grit.
Buckles and tension
Clip each buckle, pull it tight and check it holds under load; one that slips under tension will fail on a windy night. Test by loading, not just clipping: fill a stuff sack with about 5 kg of gear, clip the buckle and lift. A buckle that holds a static load but slips when jolted has a worn spring or stretched female side, replace the buckle, not the strap.
Fabric strength
Grab a section of fabric between both hands and pull gently, feeling for thin spots, stiffness or a papery texture; fabric gone stiff has likely suffered UV degradation. Denier rating tells you how thick the yarn is, so a higher denier means a heavier, tougher fabric, and ripstop nylon uses a grid of reinforcing threads that stops a small tear from running.
Puncture and tear resistance
Look for small holes, scuffs and abrasion marks, especially on the floor and around the base, as these turn into tears.
Failure patterns by category
Use this matrix to know where to look first on each item.
| Item | First failure point | Second failure point | What to inspect |
|---|---|---|---|
| Tent | Peg points and guy line anchors | Seam tape at the ridge | Webbing lift, tape edges, pole joints |
| Backpack | Shoulder strap to body junction | Base fabric and zip ends | Bar-tacks, base abrasion, zip stop |
| Sleeping bag | Main zip and lining | Baffle stitching | Zip track, lining pulls, down migration |
| Footwear | Rand and toe bumper | Lacing hardware | Sole separation, eyelet wear |
| Poles | Joint ferrules | Shock cord | Cracks, cord stretch, seating |
Repair-focused durability
Durability is not only about gear that never breaks but gear that is easiest to repair.
Before you buy, check three things: whether spare parts are sold separately, whether the zip is a standard size you can source, and whether the seams are stitched rather than welded. Welded seams are strong but almost impossible to repair at home.
Camping Gear Maintenance That Extends Lifespan
Clean and dry your gear after every trip. That single habit does more for gear longevity than anything else you can buy.
Dirt holds moisture and grit against fabric, and grit grinds away at coatings. Mud left on a tent floor slowly wears through the waterproof layer.
- Tents: brush off dirt, wipe with a damp cloth, dry fully before packing
- Sleeping bags: air them out, spot clean marks, follow the label for washing
- Backpacks: empty every pocket, wipe the base, check buckles
- Zips: clean and lubricate at the start of each season
- Poles: wipe joints dry so they do not corrode
Store everything loosely. Never leave a tent compressed in its bag for months.
Repair or Replace? Making the Call
Repair first when the damage is small and local; replace when the fabric itself has gone.
A repair kit pays for itself the first time you use it. Our Mons Peak IX Night Sky Home & Field Repair Kit at £19.95 covers fabric rips, tears and mesh damage, with adhesive patches, fabric pieces and Seam Grip in one pack.

For pegging in hard ground, our Mons Peak IX Tent Stakes at £18.95 are hard-anodised 7075 aluminium with a Y profile that grips better than a thin wire peg.

| Damage | Fix | Cost of Fixing | When to Replace |
|---|---|---|---|
| Small fabric rip | Adhesive patch | Under £20 | Rarely |
| Split seam | Seam sealant | Under £20 | If the whole seam has gone |
| Worn DWR coating | Reproofing spray | Under £20 | If water still gets through |
| Stiff, brittle fabric | Not repairable | n/a | Replace now |
| Broken pole section | Replacement pole | Varies | If several sections have failed |
Conclusion: Build Durability Testing Into Every Trip
Even the best gear needs a look-over before you pack it. Ten minutes with a torch, a cup of water and your hands will tell you more than any product label.
If something fails the checks, we stock the repair kit and the replacement pegs to sort it.
Get started with TAKE A HIKE and head out knowing your kit will hold up.
Frequently Asked Questions
How can you test a tent for durability before camping?
Pitch your tent in the garden and inspect the seams, pole sleeves and peg points for fraying or bent hardware. Run a tent waterproofing test by spraying the flysheet with water and watching for beads forming rather than soaking through. Check the hydrostatic head rating in the technical specifications, then apply gentle tension to guy lines to see how the fabric and stitching hold up.
How often should you check camping gear for wear and damage?
Inspect your kit before every trip and do a deeper check at the end of each season. Zips, buckle tension and seam tape degrade gradually, so a quick look after each use catches problems early. If you camp monthly, a full camping gear maintenance session every three months keeps abrasion resistance and waterproofing in good shape.
How can you tell whether camping gear is worth repairing or replacing?
Small fabric tears, mesh damage and worn DWR treatment are usually worth fixing. A repair kit with pressure-sensitive adhesive patches and Seam Grip handles most tent and mesh damage for under £20, far less than a new tent. Replace gear when structural integrity is compromised, such as a snapped pole, delaminated seam tape across multiple panels, or a zipper track that no longer closes.
What should you inspect on camping gear before a trip?
Run through a camping gear checklist covering tents, sleeping bags, backpacks and hardware. Check tent seams, peg points and pole elastic. Look at backpack strap stitching, buckle tension and load-bearing capacity. Inspect sleeping bag zips and loft. Test any stove or light. This takes ten minutes and prevents most field failures.


