



How to Clean Hiking Gear Properly: Step-by-Step Guide
Last Updated: November 8, 2026
Quick Summary
To clean hiking gear properly, use cool water, mild soap or a specialist outdoor fabric cleaner, and a soft brush or sponge, working by hand rather than in a machine. Brush off dry mud first, rinse so no soap residue remains, and dry everything fully in shade with good airflow before storing it loosely.
- A full kit clean takes about 60 to 90 minutes, plus drying time.
- Never machine wash a tent or a framed hiking backpack; clean both by hand.
- Skip fabric softener entirely and run an extra rinse to clear all soap.
- Cleaning a pair of hiking boots takes about 20 minutes per pair.
- Dry boots at room temperature stuffed with paper; a soaked pair needs 24 to 48 hours.
Table of Contents
- Before You Start: What You'll Need and Why It Matters
- How to Clean a Hiking Backpack Without Wrecking It
- How to Clean a Tent and Protect Its Waterproof Coating
- How to Wash Waterproof Hiking Gear and Technical Clothing
- How to Clean Hiking Boots and Technical Footwear
- Washing Sleeping Bags, Down and Synthetic
- Drying Times, Storage and a Post-Trip Checklist
- Common Mistakes That Shorten Gear Life and How to Avoid Them
- Frequently Asked Questions
Before You Start: What You'll Need and Why It Matters
Learning how to clean hiking gear properly starts with one simple truth: to clean hiking gear well, remember that dirt is not the enemy, harsh cleaning is. Most gear fails because of rough handling and strong detergents, not because of mud. Most gear problems come from rough handling, harsh detergents, fast drying, or damp storage.
Before you touch a sponge, gather the right tools:
- A soft sponge and a damp cloth
- A soft-bristled brush, like an old toothbrush
- Mild soap or a specialist cleaner made for outdoor fabrics
- Cool or cold water
- A bucket, plus a bathtub for bigger items
- A drying space with good airflow
Why does this matter? Because the coatings and treatments that keep you dry are delicate. A waterproof coating can wear away with one hot wash. Down insulation clumps when washed with the wrong detergent.
If you want to check your gear for wear before you start, our guide on how to test camping gear durability covers the field checks that reveal problems early.
Total time: about 60 to 90 minutes for a full kit clean, plus drying time.
How to Clean a Hiking Backpack Without Wrecking It
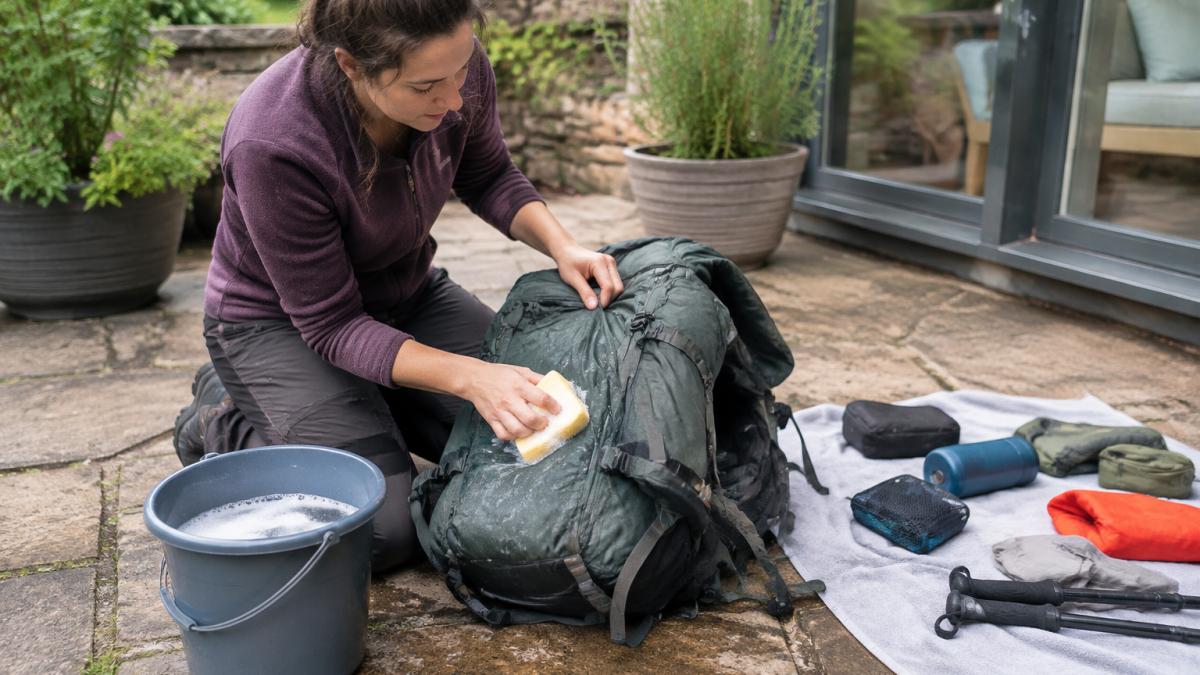
The safest way to clean a hiking backpack is by hand, with cool water and mild soap. Machine washing a framed pack can bend stays and tear seams. Empty every pocket first, then shake out grit and crumbs.
Follow these steps:
- Remove all gear, then turn pockets inside out.
- Brush loose dirt off the pack body with a dry brush.
- Mix a few drops of mild soap in cool water.
- Wipe the fabric with a damp cloth or soft sponge.
- Rinse with a clean damp cloth, no soaking.
- Hang the pack open to air-dry out of direct sun.
A common mistake is scrubbing zips with a brush. That pushes grit deeper into the teeth. Use a damp cloth along the zip instead, then let it dry fully.
How to Clean a Tent and Protect Its Waterproof Coating
Cleaning a tent means removing dirt without stripping the water-repellent finish. Pitch the tent, brush off dry mud, then wipe the fabric with a damp cloth and mild soap. Never put a tent in a washing machine.
Pay attention to three things:
- The floor: the dirtiest part, so wipe it last.
- The flysheet: rinse gently, no scrubbing.
- The zips and seams: clean with a cloth, not a brush.
Rinse with clean water and let the tent dry completely before packing. Store it loosely, never compressed for months.
If you find a broken pole while cleaning, our guide on where to buy replacement tent pole sections explains your options.
How to Wash Waterproof Hiking Gear and Technical Clothing
Waterproof jackets and technical clothing need a gentler approach than everyday laundry. Check the care label first. Most items allow a cool, gentle cycle with a specialist cleaner, but some need hand washing.
Here is the safe method:
- Close all zips and fastenings.
- Brush off loose mud.
- Wash on a cool, gentle cycle with a technical cleaner.
- Skip fabric softener entirely.
- Run an extra rinse to clear all soap.
- Air-dry, then tumble on low heat only if the label allows.
Heat can reactivate a water-repellent finish, but too much heat damages the fabric. Follow the label, always.
How to Clean Hiking Boots and Technical Footwear
Mud and grit abrade the upper, block the membrane's breathability, and wear down the outsole lugs. Cleaning hiking boots and trail shoes properly protects the leather, the waterproof membrane, and the grip, and it takes about 20 minutes per pair.
Start by stripping the boot down. Remove the laces and insoles and set them aside.
Brush off dry mud first, outside, with a stiff-ish brush. Working on dry mud is far easier than on wet mud, which smears into the fabric and pushes grit into seams.
For the uppers, match the method to the material:
- Full-grain and nubuck leather: use a dedicated leather cleaner and a soft cloth. Work in small circles, wipe off with a clean damp cloth, and never soak the leather. Leather that dries too fast cracks, so keep it out of direct sun and away from radiators.
- Suede: brush dry with a suede brush, then spot-clean stains with a suede eraser or a cloth barely dampened with water. Do not use soap on suede, it stiffens the nap.
- Synthetic and textile uppers: a soft brush, cool water, and a few drops of mild soap are enough. Rinse with a clean damp cloth so no soap residue is left to attract dirt.
- Waterproof membranes (Gore-Tex and similar): the membrane itself does not need soap, it needs the outer fabric kept clean so it can breathe. A clogged face fabric traps moisture inside, which feels like a leak but is actually condensation.
Watch out: never soak boots or submerge them in a bucket. Waterlogged leather takes days to dry, and the midsole foam can delaminate when it stays wet.
Rinse the whole boot with a clean damp cloth, not a running tap. Then re-proof.
Dry boots at room temperature, stuffed loosely with newspaper or kitchen roll to hold their shape and draw moisture out. Change the paper when it feels damp, usually after two to three hours.
Trail shoes and approach shoes follow the same logic but dry faster, usually 12 to 24 hours, because they have less leather and more mesh.
Finally, deal with odour at the source. Footwear smells because bacteria feed on sweat and dead skin trapped in the lining. A sprinkle of bicarbonate of soda left in the boot overnight, then shaken out, neutralises odour without perfume.
Washing Sleeping Bags, Down and Synthetic
A sleeping bag lasts longer when washed rarely and correctly. Down bags need a down-specific detergent, never ordinary laundry detergent. Synthetic bags tolerate a gentle machine wash on a cool cycle.
Wash down bags in a large front-loading machine, or by hand in a bathtub. Use a down detergent, run an extra rinse, and dry on low heat with dryer balls to break up clumps. It can take several hours.
After washing, store your bag loosely, not compressed. For trips, a nylon sleeping bag compression sack helps keep a clean bag compact in your rucksack.

Drying Times, Storage and a Post-Trip Checklist
Drying is where most gear damage happens, and it is the step most people rush. Damp storage causes mildew, odour, and, in down, permanent clumping. The rule is simple: nothing goes into storage until it is completely dry, inside and out.
Airflow matters more than heat. A shaded spot with moving air dries gear faster and more safely than a warm room with still air.
Here are realistic drying times, assuming good airflow and room temperature:
| Item | Drying Method | Typical Time |
|---|---|---|
| Backpack | Air-dry, open, shaded | 12-24 hours |
| Tent | Air-dry, pitched or hung | 4-8 hours |
| Waterproof jacket | Air-dry, then low tumble if label allows | 2-4 hours |
| Hiking boots | Air-dry, stuffed with paper | 24-48 hours |
| Trail shoes | Air-dry, laces out | 12-24 hours |
| Down sleeping bag | Low heat with dryer balls | 3-6 hours |
| Synthetic sleeping bag | Air-dry or low tumble | 4-8 hours |
| Hydration reservoir | Air-dry, open, upside down | 12-24 hours |
Typical Time
Down needs special care. A down bag that is still damp inside will clump, and once clumped it loses loft and warmth.
Watch out: a tent packed away damp is the fastest route to mildew. Mildew stains fabric permanently and weakens the coating, and the smell is very hard to remove.
Mildew prevention is mostly about storage. Store gear clean, dry, and loosely packed in a cool, dry place. Never store a sleeping bag compressed, compression weakens the loft over time. Hang it, or store it in a large cotton or mesh sack.
For clean kit between trips, a waterproof dry bag can help organise and store it, but only once everything inside is bone dry.

Run this post-trip checklist every time:
- Empty every pocket and shake out grit and crumbs
- Brush off dry mud before it sets
- Spot clean stains with a damp cloth and mild soap
- Rinse thoroughly so no soap residue remains
- Dry everything fully, in shade, with airflow
- Check for damage, tears, broken zips, worn soles, and note repairs
- Store loosely, never damp, never compressed
A seasonal deeper clean, washing sleeping bags, re-proofing jackets and boots, cleaning hydration systems, is worth doing at the start and end of each season. That schedule, plus the after-every-trip routine above, is what keeps gear working for years rather than seasons.
Common Mistakes That Shorten Gear Life and How to Avoid Them
The biggest gear killers are easy to avoid once you know them. Here are the mistakes we see most often:
- Hot washes: heat strips waterproof coatings. Use cool water.
- Ordinary detergent: it damages down and water-repellent finishes. Use a specialist cleaner.
- Fabric softener: it clogs fabric and kills breathability. Skip it.
- Damp storage: mildew sets in fast. Dry fully, every time.
- Direct sunlight drying: UV weakens fabric. Dry in shade.
Watch out: packing a tent away damp after a wet trip is the fastest route to mildew and a ruined coating. If you find damage during cleaning, a repair kit can be used to repair fabric tears and mesh damage.

Cleaning your kit properly is the cheapest way to make it last for years. At TAKE A HIKE, we stock gear built to survive real trips, backed by free tracked delivery on orders over £50, a 14-day return policy for unused items, and customer support six days a week. Get started with TAKE A HIKE and keep your gear trail-ready season after season.
Frequently Asked Questions
How do you clean hiking gear after a trip?
Empty every pocket and shake out grit and debris first. Spot clean with a damp cloth and mild soap, then hand wash fabric items in cool water and rinse thoroughly. Air-dry everything fully away from direct heat before storing. Clean hiking gear within a day or two of returning so mud and sweat don't set into fibres. Check care labels on each item, as down insulation and waterproof coatings have their own requirements.
Can you put a hiking backpack in the washing machine?
Most hiking backpacks should be hand washed, not machine washed. Agitation can damage straps, buckles, frames and water-repellent finishes. Remove the frame or back panel if it detaches, empty all pockets, and brush off loose dirt. Wash the pack body in a tub of cool water with a gentle cleaner, rinse well, and air-dry it upside down in the shade. Check the manufacturer's care label before doing anything else.
How often should you clean hiking gear?
Clean hiking gear after every trip for dirt, mud and sweat, and give it a deeper wash at the end of each season. Backpacks and boots usually need a quick brush and rinse after each outing, while tents and sleeping bags can go longer between full washes if they stay dry and clean. Store everything dry and loosely packed, and inspect seams and coatings during seasonal maintenance so small repairs don't become replacements.
How do you clean a tent without damaging its waterproof coating?
Pitch the tent and brush or sponge off dirt with cool water and a mild soap, never a harsh laundry detergent. Rinse thoroughly to remove all soap residue, then air-dry completely before packing. Avoid scrubbing seams and coated fabric aggressively, and never machine wash a tent. If the water-repellent finish has worn off, reproof it with a suitable product. Store the tent dry and loosely folded to prevent mildew and coating damage.


