



How to Check Hiking Gear Quality Before You Buy
Table of Contents
- How to Check Hiking Gear Quality: What Actually Matters
- Your Hiking Gear Checklist for a Full Kit Inspection
- How to Inspect a Hiking Backpack: Seams, Straps and Load Tests
- How to Test Hiking Boots for Fit, Traction and Waterproofing
- How to Check if a Tent Is Waterproof Before You Pitch It
- Field Tests: How to Try New Gear Before a Big Hike
- When to Repair, Replace or Return Poor-Quality Equipment
- Conclusion: Build a Kit You Can Trust
- Frequently Asked Questions
Last Updated: October 7, 2026
How to Check Hiking Gear Quality: What Actually Matters
Hiking gear quality is the sum of how well a piece of kit is built, how well it fits you, and how it holds up under real trail conditions.
So here is the honest version of how to check hiking gear quality before you spend a penny. Below, we break down exactly what to inspect, how to test it, and when to walk away.
Most buying guides tell you to "look for good materials." That is useless advice. You need to know which specific details separate kit that lasts from kit that lets you down.
Your Hiking Gear Checklist for a Full Kit Inspection
A hiking gear checklist is your first defence against poor-quality equipment. Run through it before you buy anything, and again before every big trip.
Start with the items that keep you safe and dry:
- Boots or shoes: flex the sole, check the rand, press the seams
- Waterproof jacket: check taped seams, zip flaps, and hood adjustment
- Backpack: test straps, buckles, and stitching at stress points
- Tent: inspect the groundsheet, fly, and pole joints
- Layering: check fabric weight, stitching, and insulation loft
For each item, ask three questions. Is it built to last? Does it fit your body and your trip? Can it be repaired if it fails?
If the answer to any of these is no, keep looking. Cheap gear that fails on a cold, wet hillside costs far more than the money you saved.
How to Inspect a Hiking Backpack: Seams, Straps and Load Tests
To inspect a hiking backpack, focus on the seams, straps, and how it carries weight. These three things decide whether a pack lasts a season or a decade.

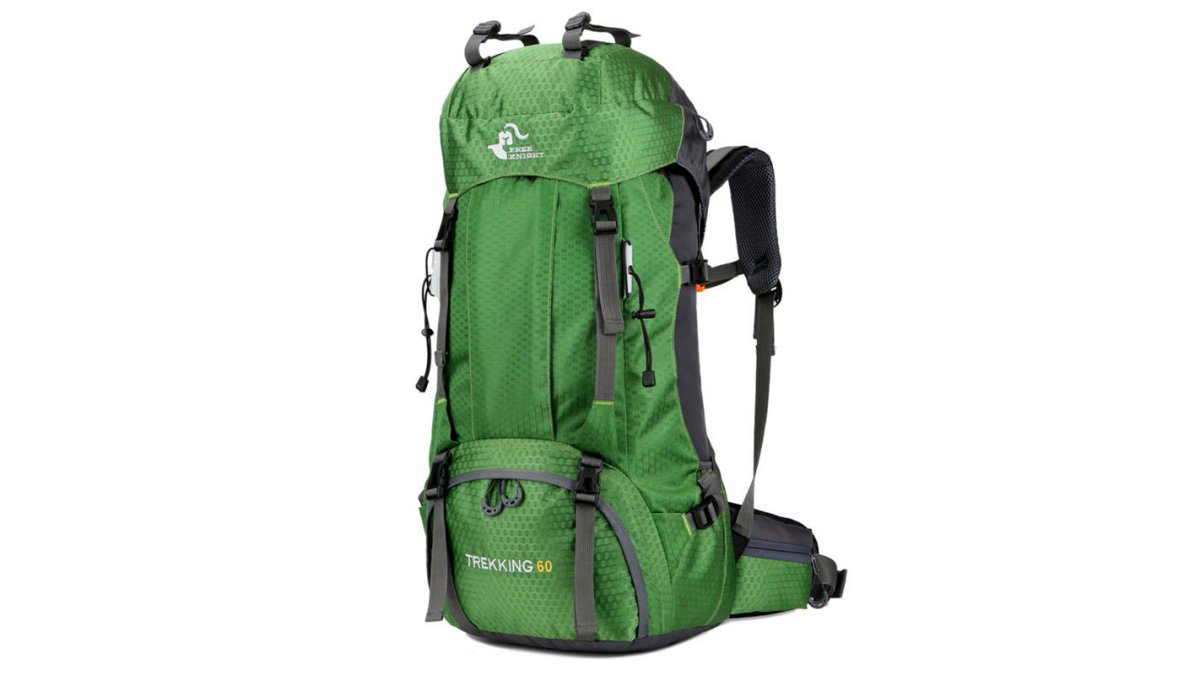
Turn the pack inside out. Look at the stitching along the base and where the shoulder straps meet the body. These are the stress points, and they take the most punishment.
What most guides miss is the hardware. Cheap buckles crack in cold weather, and thin webbing frays fast. Squeeze every buckle and pull hard on each strap.
Then load it. A good test is to add weight and walk for ten minutes:
- Does the hip belt transfer weight off your shoulders?
- Do the straps stay put, or do they slip?
- Does the back panel dig in anywhere?
A pack that carries well from the start rarely causes trouble later. Our 36-55L hiking backpack uses durable Oxford fabric and a medium-hard construction that helps it hold its shape under load.
How to Test Hiking Boots for Fit, Traction and Waterproofing
To test hiking boots, check three things: fit, traction, and waterproofing. Get any one wrong and your trip gets uncomfortable fast.
Fit comes first. Your heel should stay locked in place, and your toes should not touch the front when you walk downhill. Try boots on late in the day, when your feet are at their largest.
For traction, look at the outsole pattern. Deep, well-spaced lugs grip better on mud and loose ground. Press your thumbnail into the rubber; if it feels hard and slick, it will slide on wet rock.
For waterproofing, check the seams and the tongue. Water gets in through gaps, not through the fabric itself.
Our women's waterproof hiking shoes use a traction sole and a waterproof design, while the quick-dry mesh hiking shoes suit warmer, drier walks where airflow matters more than full waterproofing. For sizing, always check the chart and go up a size if you are between sizes.


How to Check if a Tent Is Waterproof Before You Pitch It
To check if a tent is waterproof, inspect the hydrostatic head rating, the taped seams, the groundsheet, and the zip flaps.
A hydrostatic head rating measures how much water pressure a fabric can take before it leaks. The British Standard for outdoor textile testing sets out how these ratings are measured, so look for a stated figure rather than a vague "waterproof" label.
Next, run your fingers along every seam inside the fly. Taped seams should feel smooth and sealed. Loose or peeling tape means water will find a way in.
Quick-Dry Non-Slip Outdoor Hiking Shoes with Mesh Upper →
Check the groundsheet separately. A thin groundsheet punctures easily on rough ground. If it feels flimsy, plan to use a footprint underneath.
Finally, inspect the zip flaps. A waterproof zip alone is not enough; the flap over it should overlap generously and sit flat when closed. Run your hand along the flap to check it does not curl or gap.
Field Tests: How to Try New Gear Before a Big Hike
Field testing means using new gear on short, low-risk trips before you rely on it. This is the step most people skip, and it is the one that saves trips.
Start close to home. A local park or a short trail lets you test kit without real consequences. Wear your boots for an hour. Pitch the tent in the garden. Load the pack and walk a few miles.
Then push a little harder. Take the gear out in light rain, or on a cooler day, to see how it copes. You want to find the weak points while the stakes are low.
Here is a repeatable field-test sequence you can run over two or three short outings:
- Boots: Walk 5 km on a mix of wet grass, loose gravel, and a steep descent. Check for heel lift, toe strike, and any hot spots. A boot that rubs at 5 km will blister at 15 km.
- Waterproof jacket: Wear it in steady rain for at least 20 minutes. Check the hood stays up in wind, the cuffs seal, and the fabric does not wet out (where the surface soaks and stops breathing).
- Backpack: Load it to the weight you would carry on a full day, typically 8-12 kg for a day pack, more for an overnight. Walk 5 km. Check the hip belt transfers weight, the shoulder straps do not dig in, and nothing slips.
- Tent: Pitch it in wind (a breezy day is enough). Check pole joints do not pop, guy lines hold, and the fly does not flap against the inner. Then spray the fly with water to check beading.
- Layering: Wear your full layering system on a cool, damp walk. Check you can vent heat without stopping, and that no layer bunches or restricts movement.
If something rubs, leaks, or slips, you have found it early. That is exactly the point. Keep a note of what failed and under what conditions, that record is more useful than any review when you decide whether to repair, replace, or return.
When to Repair, Replace or Return Poor-Quality Equipment
Deciding when to repair, replace, or return gear comes down to safety and cost. Some failures are easy fixes. Others mean the item is finished.
Repair is usually worth it for minor damage. A loose stitch, a worn strap, or a small tear in a fabric panel can often be fixed at home or by a repair service. Many outdoor items are built to be mended, which extends their life and keeps them out of landfill.
Replace when the failure affects safety or performance. A cracked buckle, a delaminated sole, or a failed waterproof membrane cannot be trusted on a serious trip.
Return poor-quality equipment if it fails early or does not match its description. TAKE A HIKE offers a straightforward 14-day return policy for unused items, so check the condition rules before you buy. If a product arrives faulty, contact support, which is available six days a week, 8am to 8pm.
Use this quick guide:
| Problem | Action | Why |
|---|---|---|
| Loose stitching | Repair | Cheap fix, no safety risk |
| Worn strap | Repair or replace | Depends on load-bearing use |
| Cracked buckle | Replace | Can fail suddenly under load |
| Leaking membrane | Replace | Cannot be reliably repaired |
| Faulty on arrival | Return | Covered before use |
| Wrong size | Return | Fit affects comfort and safety |
Conclusion: Build a Kit You Can Trust
Buying gear is easy. Buying gear that lasts takes a bit more care. Check the seams, test the fit, and field-test anything new before a big trip.
If you would rather skip the guesswork, TAKE A HIKE stocks top-quality hiking and camping gear, with free tracked delivery on orders over £50 and support six days a week. Our range covers footwear, backpacks, and trekking poles like our carbon fibre trekking poles.
Get started with TAKE A HIKE and build a kit you can trust on every trail.
Frequently Asked Questions
How can you tell if hiking gear is good quality?
Start with the construction, not the label. Check for double-stitched seams, taped or sealed seams on waterproof items, and stress points reinforced with bar tacks or rivets. Flex the item and listen for cracking or creaking, which suggests stiff or ageing materials. Zip quality matters too: metal or chunky plastic teeth outlast fine nylon coils on a backpack. Finally, look at the hardware, buckles and cord locks. If they feel hollow or flex under finger pressure, the rest of the build is likely similar.
What should you check before buying a hiking backpack?
Load it before you commit. Ask to put 8-10kg in the pack and walk around for five minutes. Check that the hip belt carries most of the weight on your hips, not your shoulders, and that the shoulder straps sit flat without digging in. Inspect the base and corners for reinforced fabric, since these take the most abrasion. Look at the stitching around the shoulder strap anchor points, the most stressed area on any pack. A 36-55L pack suits most weekend trips, but fit matters more than litres.
How do you test hiking boots before a long hike?
Wear them indoors for an hour first, then take them on two or three short walks of 3-5km on mixed ground. Check for heel lift (your heel should stay locked), toe room (about a thumb's width at the front) and any rubbing at the arch or ankle. Test traction on wet grass and loose gravel. For waterproofing, stand in a shallow puddle for a minute and watch for damp patches at the seams. If anything rubs on a 5km walk, it will blister on a 20km one.
How can you check whether a tent is waterproof?
Check that seams are taped or sealed, not just stitched, since needle holes leak. Pitch it in the garden and run a hose over the flysheet for five minutes, then check inside for drips at the seams and corners. Pay attention to the groundsheet: it should feel rubbery and thick, not thin and crinkly. A tent that fails any of these tests is not worth taking on a wet-weather trip.
Quality gear is not about spending the most. It is about knowing what to look for and refusing to settle for kit that fails when it matters. At TAKE A HIKE, we help you equip yourself for every outdoor adventure with reliable, well-made equipment. Browse our range and get free tracked delivery on orders over £50, backed by a 14-day return policy for unused items.


